Showing posts with label valentines. Show all posts

XOXO - Scrappy Saturday

 
For this layout I used a bunch of pink scraps to create the heart covered background.  The arrow paper was scrap also.  I then added red heart rhinestones to fill in.  Looks Great.  The picture is of the girlies with Dave at the Daddy Daughter Dance that happens here around every Valentines Day.   The picture turned out great!  I love that our Park District does this for the Dads.

Galentine's Weekend Retreat Valentine Swap

The Valentine's I created for the Galentine's Weekend Retreat in Wisconsin at Birchtree Craft Retreat.  I ended up going alone as my girlfriend had a family emergency.   It was all good I watched a lot of Amazon Prime and Netflix and got lots done.  On Saturday we shared our Valentine's with all of the other ladies there. 
 
These were created using a Mama Elephant  stamp set Love From Above.  I stamped and colored them with Copic's, then cut them with my new Brother Scan and Cut.  OOOOOH total game changing tool.  So excited I got this for Christmas.    The background for the card was made using a Stamp Anniething cloud stencil set and 3 shades of pink Distress Oxide ink.  The Happy Galentine's Stamp was from a Hero Arts set embossed in gold. 

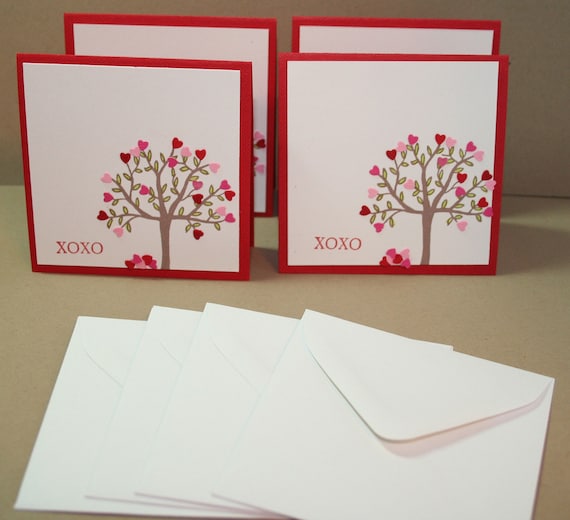
I did put candy and a little candle in the boxes.  They are from Stampin Up back in the day when you could buy packages of boxes already die cut.  I stamped them with an All & Create stamp of X's O's and love.
 
Super happy how they turned out.   Happy my little lone road trip turned out good and not a lot of snow although it was chilly.  I did stop at Pop's and buy some treats for everyone along with some Pasty's for dinner and then a little side trip to Fancy Barn(The Elegant Farmer) for a wonderful pie for desert before heading home.  It was a good drive for a couple of pod casts.

I was happy to get home though and be able to see everyone and the puppies.  I will  share some of my haul later this week. Birchtree has the best store I've been to in a long time.

Hugs and here's to a great week ahead.

Sending You Love - Card

 
Welcome to the Month of Love.....   These were created with a MMH Kit(My Monthly Hero).  I love Hero Arts kits they create the most awesome cards.   The images were colored with Copics and popped up on blue shimmer cardstock.  The little hearts have stickles on them.

This wrap around cloud die is my current favorite there is so much you can do with it.   I did add stickles to the edge of the cloud for sparkle.
I created these a little different I cut a portrait card but pushed it over on it's side.  I thought that was cute for the plane it elongates the card somehow.  
 
Thank you for stopping by to take a look. 

Scrappy Saturday - Sister Snap Love

 
Trying really hard to get into Valentine Mode.  I've started making my cards and had all my heart supplies out, so I grabbed  my Scraproom February Kit and some other scraps that matched Echo Park Cupid & Co.  to punch hearts out.  I then laid them out in rows on black cardstock.  There are some Glossy black and shimmery red hearts in there as well.    I love love how the background turned out.  The photo got matted a couple of times and popped up with foam tape.  Happy to use some older tools to create a fresh looking layout!
 
Thank you for stopping by hope you're all getting exciting for Valentines Day.  Hope you have a Wonderful one!

Valentine Card - Spellbinder Small Die of the Month January 2021

 My Spellbinders kit comes late in the month.  Sometimes I hat this and sometimes I love that it gives me time to plan what I'm going to do.  I had some fun creating some Valentine Cards with this one.  I also added some old greeting dies I had in my stash to complete this.


Valentine Cards - Washi Tape Valentine

So I'm trying to get some Valentine cards done and use up some of my stash that was part of my 2021 Goals this year. (I have a post on this here) I have an entire container of Washi tape I want to use up so I pulled out reds, pinks and blacks and grabbed some more from my regular stash to create these backgrounds.
I then pulled out all my Love/Valentine dies and used these to create the greetings and to cut the larger hearts.  All of this is popped up with foam tape over the washi tape background. 
It was fun using up stash and some dies I forget I have.   
 
I love the washi tape backgrounds I think I'll try this for another set of cards at some point.  I will say this though, washi tape is hit or miss.  There was a lot of cussing when I would get to a roll that just would not peal up.  I think I tossed about 3 full rolls, my patience is lacking when things don't work as they should.  There was a lot of garbagey pieces for the ones that worked even.
 
I am going to revise my 2021 goals just a bit when I get to the quarter to include cards and other projects not just layouts.  Since I  do all kinds of paper crafts and as long as I'm using stash it should count?  No?

Tree Full Of Hearts Mini Cards - Valentine Card Series

These cards are so fun to make.  I would love to say they are quick but all of those little hearts are glued on individually which makes them super sweet.  I love this little tree stamp from AMuse (I know it's old, but I use it every year)!   The XOXO is Stampin UP I color the leaves green and then go nuts with the hearts in various colors of pink and red.  Everything is layered onto red cardstock.  When I sell these each one gets the cutest little envelope that fits perfectly these tine 3" cards.   Who can resist tiny things?  No one can that's who!

If you would like to see more Valentine's and all the Year Round Items, please visit the shop at:  www.etsy.com/shop/papertivity


Thank you so much for stopping by today to take a look at some Mini Cards in my Valentine Card Series!  You are so appreciated!

Bucket of Hearts With Love - Valentine Card Series

YAY more cards from Scrap Die Cuts.  I was so on a roll with the last card that I had to continue with another.  More of the same hearts and I found this Awesome Bucket in my box of scrap die cuts.  I believe it is Memory Box or Poppy Stamps as well.  Who doesn't want buckets full of hearts for Valentines?  The greeting is Silver Sticker.  Hardest part of this card was filling the bucket with hearts.  I love making these quick adorable cards for Valentines!
Hope you are enjoying the Valentine Card Ideas.  Thank you for stopping by for a visit!

With Love Hearts - Valentine Card Series

I'm having fun doing up some Valentine Cards from my scraps especially my die cut scrap box.   You know how you go to make something and the die either cuts more than you need, the negative is great or the color or size was just not right so you cut it again to finish up.  Now your left with all of these extra pieces.  I have a box full of these because I hate to throw them out.  So I've started pulling a pile of them out every once in awhile and making up some cards.  Here the hearts and circle are leftover.  I know the heart die is Memory Box and it is the negative from a die.  
I used some Washi tape strips for the greeting and the polka dots.  The patterned paper is from my scrap bin.  With a little black ribbon it was a quick lovely card.  

It really is a great way to used up your scraps.  I like to get the kids involved as well.   I will have them pick out some items and then we have to create something with it.  It's fun to work with them listen to their ideas and it really helps gets the creativity going especially if your not feeling the MOJO.  You could even ask a friend to play along!
Thank you so much for stopping by to take a look.  Hope your having a Wonderful week so far!

Hearts and Love


I've been busy creating Valentines.  Which really wasn't my intention but I guess I've been inspired by all of the beautiful projects around the web I just can't help myself.  Well that and a lot of the cool color challenges have a Red element, which makes it a no brainer.

Today I have a card using my current favorite watercolor medium Brushos and Tulip Tie Dye powder.  The red strip is created using those two items on watercolor paper.  Once it was dry I used a Memory Box stencil Hearts Heart Confetti and white embossing paste.  The patterned paper is from my stash.  The Love in the heart is a MFT die Heart Full of Love cut from a blue scrap and silver mirror card.   For a little more texture I've added some twine with a bow.

 This card is for three challenges:

1.  Daring Cardmakers - January Inspiration Picture
I've used 3 things from the picture first the color, second the twine and third the heart shape with silver around the edge.
 

2.  Simon Says Stamp - Monday Challenge - Stencil It

3.  Mojo Monday - Sketch #430
   

Thanks so much for stopping by today!  Hope your having a Happy Sunny Day!

Simple Love

Happy Sunday!   I was having fun this weekend creating some cards for challenges!  Here we have a Valentine.  I love how it turned out using only one older background stamp from Stampin Up French Filigree, stamped directly onto the card front,  a die cut word by Die-Versions "Everyday" Compliments and some little heart rhinestones!  I stamped with Ranger Archival Ink.  So pretty. 
I am going to enter this card into 2 challenges today.

First  "Less is More"  - One Layer Card with a Flourish Week 258
Second  CASology - Cue Card - Simple #179

Such fun cards and happy colors!  Have a wonderful day thank you for stopping by.

Half A Heart


Happy Monday! I'm over on the Memory Box Blog today.  We enjoyed a day indoors here in Chicagoland yesterday while a little blizzard dumped some snow on us!  The residual affect is that the kids don't have school today.  Good for them they get a long weekend and a yard full of snow drifts and mounds to play in. 

Yesterday was however the perfect day to get some playing with my crafty supplies done.  So I grabbed the Half a Heart 99130 and went to town creating some Fabulous Fold Die Cut cards.  I'm so excited Memory Box came out with a die that is only half a shape for this technique.  I usually stick my nose in my die cut machine and cross my eyes to try to figure out where to stop die cutting.  This is amazingly simple.

First cut your cardstock  5 1/2" x 8 1/2", then score it at 2 1/8" and 4 1/4".  I still like to crease all of the folds lines, especially on white so I can see exactly where the score is.  Next open the card up flat and place it on your cutting mat then set the Half a Heart die to the right of the 2 1/8" score line, make sure your touching the line.  Now just cut.  That's really it.  AMAZING right no lining it up or taping it. 


I decorated the hearts with the Cross Stitched Hearts 99125 cut out of read and black cardstock.  The small hearts got foam taped to the larger ones and then glittered with Stickles.  The smallest hearts decorated the inside of the card.  I did add the XOXO from the Urban Lowercase Alphabet 98874 to the front to complete the card.


Memory Box Products used:

Half a Heart - 99130
Cross Stitched Hearts - 99125
Urban Lowercase Alphabet - 98874
Cranberry Gingham Paper - 77918


Cross Stitched Love

Good Morning!  I'm over at the Memory Box Blog  today with  another fun card using the Memory Box January 2015 Release.  This was a fun quick card using the Cross Stitched Love 99128 twice on a piece of red mirror card.  I layered the red onto black cardstock and popped it over some very cute satin ribbon hearts on top of the Dot Licorice paper.   This would be a great mass produced card if you had to make some for a full class or office.   

Memory Box Products Used:
Cross Stitched Love 99128
Dot Licorice Paper 77902

Thank you so much for stopping by and I hope you like it.  Have an Wonderful Day!
 

Nested Birds

 How cool is this Silhouette file.  These are boxes that fit together once they are complete.  Their little Love Birds!  I adore them!  They adore each other!  Everyone is super happy!


Bombshell February Sketch - Hearts Treasure


Today we're using one of Kathi's fabulous sketches for this months Bombshell Sketch Challenge over on the Bombshell Blog.  This month I've used Mermaid Treasure, All My Heart & Banner Sayings.  I colored everything with Copic's and masked everything off then airbrushed the background with Copics as well.  

I hope you get a chance to play around with the sketch be sure to post a link to your card over at the Bombshell Blog for the opportunity to win some stamps!  Woo Hoo.

Have a great day!


Today is Art With Heart Day

What a fun holiday!  We celebrated on the Bombshell Blog yesterday a little early.  You have to pop over and see what all the designers created!  AMAZING!  And perfect ideas for the upcoming Valentine Holiday.

Since I didn't get around to working with Kathi's lovely sketch earlier this month I decided to use it for this card.  The Bombshell Stamps used  the card is from All My Heart Stamp set which is perfect for heartfelt cards.  I colored the hearts with copics and inked over everything with Distress(Old Paper) to give it a vintagey look.  Then it was layered onto a Lacey Oval from Spellbinders.  The strips of paper are from Canvas Corp and also inked with Distress Ink.  Thank you so much for stopping by!

Hope you have all had a wonderful week.  We're ready for the weekend here and more snow of course, tee hee, the kids will hopefully be able to take advantage of fresh snow since it will be in the 20's here instead of -20's.  Here's hoping for some sledding this weekend.  Have a great one!

Delivering Trucks of Love

MBdumptruckI'm back at the Memory Box Blog today with a fun boyish card.    You know how sometimes you have an idea but it's not quite cooked?  Well this was half cooked idea then I was sitting chatting with my kiddos and BAM crazy how fast the completed idea comes and I had to get up and do it right away before I forgot.  I dug through my drawers and found my furnace tape and my Alcohol Inks and colored up a piece of tape with a yellow/gold color.  I then cut out 3 of the Dump Trucks.  With a Black copic I carefully colored the outside of the wheels and set them aside.  Then came the background piece which was sponged with brown, green and blue Distress ink to create an outdoor scene.  Using the Happy Arrows Stencil I created a sign by stenciling Distress Ink over it outlining it in black ink and cutting it out.   The brown is just a couple of handcut strips of brown cardstock and the sign is stuck on top to create the sign posts.   At this point one truck get cut in half so that it can be dumping some of the hearts on the ground. Then the Dump Trucks are stuck down and a ton of hearts are cut with the Heart of Hearts Die and put into the back of the trucks.  Hope you like it I am totally excited by the metal trucks!   This would be a fun fun Boy Card you could put all kinds of things in the truck.
Products Used -
  • Dump Truck - 98476
  • Happy Arrows Stencil - 88509
  • Heart of Hearts - 98781
  • Russian Sage Card Base
  • Distress Ink - Vintage Photo, Crushed Olive, Stormy Sky, Mustard Seed
  • Alcohol Ink - Butterscotch and Sunshine Yellow
  • Furnace Tape
  • Brown & Red Cardstock
  • Copic Marker - 100 and a Black Multiliner
Hope you like it!  Thanks for stopping by!

Fabulous Folds Peek

Here is a quick peek of my Fabulous Folds Class Next week 30th @CraftFancy.  We will be creating 4 cards and a 3D project and we will feature Fancy Folds or Fun Shaped cards.   Can't wait to share them all with you!  Check back for more peeks throughout the week.
 

Hope you can sign up for a class or a fun kit, call Craft Fancy to reserve your spot today.   Don't forget your Scoring Tools along with your Basic Tool Kit.

Lawnscaping Challenge #51 - Together


This weeks inspiration was is:


I had fun using the Love n' Breakfast  set by Lawn Fawn.   I colored the images with Copic.  I cut them out and layered and popped them up with foam tape.   The greeting is a combination of 2 in the set, which I cut apart to use them.  Other items used:  Patterned Paper - BoBunny Double Dots, Washi Tape - Recollections, Jute - Canvas Corp., Spellbinders Labels 2,  Heart Punches and Border Punch - Fiskars, Other  Ink - Chalk and my WRMK Corner Chomper.  Be sure to check out all of the other amazing projects over at the Lawnscaping Blog.

 It's Tuesday and getting warmer again.  The kids are sad the snow is melting all their work on forts in the yard has gone in vain with the rain yesterday and the warmer weather.  They may still get another chance so no worries.  Here in Chicago anything is possible.  Off to work in a bit.  Can't wait to see what new has come in.  Hope you all have a great day!  Thank You for stopping by!

Updated to add this entry was given an Honorable Gnome!


More Bees - Playing with the Diffuser

I finally got around to playing with the Tim Holtz Diffusers and the Honeycomb Embossing folder.  I can't believe I was intimidated by them.  So simple and such a cool affect.  I've also used the Memory Box Jolly Bumble Bees and the Honey Bee Skep as well as the greeting from Lawn Fawns Bee Mine stamp set.  

We did a little shopping at ABT yesterday and in 3 more days my new dryer arrives this is my Valentine gift WOO HOO.  I can't wait to do laundry!  For real not that I haven't done laundry for the last two months I've just been hanging everything to dry.  Which is very time consuming considering how little space we really have to hang laundry.  So I am a bit behind.  You can see how my Friday will go right.  That's ok I'm looking forward to warm fresh laundry out of the dryer.

Enough about my laundry issues their just boring.  Tonight after Em's Chorus rehersal we are baking Yummies for the Art Clubs Valentine Party and working on Ab's b-day party invites.  That is more exciting!  Can't wait to get crafty with the girlies once they are home from school and activities.  It will be a great kick off to the week.

Happy New Week.  for stopping by!