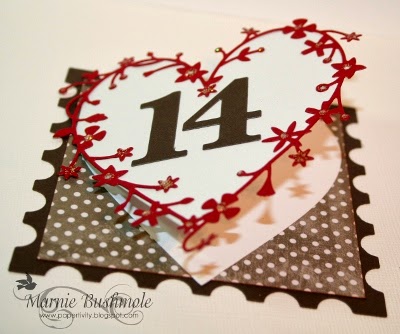
Today is Art With Heart Day

What a fun holiday!  We celebrated on the Bombshell Blog yesterday a little early.  You have to pop over and see what all the designers created!  AMAZING!  And perfect ideas for the upcoming Valentine Holiday.

Since I didn't get around to working with Kathi's lovely sketch earlier this month I decided to use it for this card.  The Bombshell Stamps used  the card is from All My Heart Stamp set which is perfect for heartfelt cards.  I colored the hearts with copics and inked over everything with Distress(Old Paper) to give it a vintagey look.  Then it was layered onto a Lacey Oval from Spellbinders.  The strips of paper are from Canvas Corp and also inked with Distress Ink.  Thank you so much for stopping by!

Hope you have all had a wonderful week.  We're ready for the weekend here and more snow of course, tee hee, the kids will hopefully be able to take advantage of fresh snow since it will be in the 20's here instead of -20's.  Here's hoping for some sledding this weekend.  Have a great one!

Delivering Trucks of Love

MBdumptruckI'm back at the Memory Box Blog today with a fun boyish card.    You know how sometimes you have an idea but it's not quite cooked?  Well this was half cooked idea then I was sitting chatting with my kiddos and BAM crazy how fast the completed idea comes and I had to get up and do it right away before I forgot.  I dug through my drawers and found my furnace tape and my Alcohol Inks and colored up a piece of tape with a yellow/gold color.  I then cut out 3 of the Dump Trucks.  With a Black copic I carefully colored the outside of the wheels and set them aside.  Then came the background piece which was sponged with brown, green and blue Distress ink to create an outdoor scene.  Using the Happy Arrows Stencil I created a sign by stenciling Distress Ink over it outlining it in black ink and cutting it out.   The brown is just a couple of handcut strips of brown cardstock and the sign is stuck on top to create the sign posts.   At this point one truck get cut in half so that it can be dumping some of the hearts on the ground. Then the Dump Trucks are stuck down and a ton of hearts are cut with the Heart of Hearts Die and put into the back of the trucks.  Hope you like it I am totally excited by the metal trucks!   This would be a fun fun Boy Card you could put all kinds of things in the truck.
Products Used -
  • Dump Truck - 98476
  • Happy Arrows Stencil - 88509
  • Heart of Hearts - 98781
  • Russian Sage Card Base
  • Distress Ink - Vintage Photo, Crushed Olive, Stormy Sky, Mustard Seed
  • Alcohol Ink - Butterscotch and Sunshine Yellow
  • Furnace Tape
  • Brown & Red Cardstock
  • Copic Marker - 100 and a Black Multiliner
Hope you like it!  Thanks for stopping by!

Bombshell Blog Hop - Animal Instincts


It's time again for the Bombshell Stamps Blog Hop.  This months theme is Animal Instincts.  I was so excited to create a fun background for this theme.  I used a stencil to create a faux snakeskin paper strip.  I had a great time playing with distress inks and perfect pearls to create the snakeskin affect. Then I colored Bombshell Angel with Copics and created her earthy bathing suite she's Bombshell Snake Charmer isn't she?  The greeting is from Banners Sayings (which is on sale right now) and inked up with more Distress Ink then I went over the words with glaze pen along with Angels shoes, Lips and Flower to add a bit of sparkle.

Be sure to head on over to all the Amazingly Talented Artists blogs below and check out their take on the Animal Instincts Theme.  Thank you so much for stopping by.


Fabulous Friday Tutorial - Bombshell

Good Morning.  I'm over at the Bombshell Blog today with a Fabulous Friday Tutorial.   
 Begin with a piece of double sided patterned paper that measures 4" x 12"
 Score first at 2"
 Now Score at 10"
 Fold each flap to the back
 Unfold and find the center point(6") on both the top and the bottom.
 Fold down one side lining it up with your pencil marks.
 Repeat for the other side.  Flip your paper over and do repeat the last 2 steps for the opposite side of the paper.
 These scores create an X through either side of the center square.  Fold in the two unscored sides in to the center to of each side.  Score each of these with a bone folder.
 
 This will create an envelope look on each side of the card.
Notice mine is a little cracked on the edges.   I trimmed off some of the cracked edges at the end and inked them all up so they looked neat.  Some patterned paper will crack and some won't but if you know how to fix it.  It is not a problem for the end product.
And a Pop Up Diamond in the Center.
Now all you have to do is embellish with a Bombshell stamp, some ink and patterned paper.
In this card I have used the Lotus Garden stamp set.  Colored the image with Copic Markers and then added some glitter to the image.  I have inked the edges of the piece that was die cut with Labels 15 from Spellbinders.  Which was also used to cut out a piece to put on the square with coordinating cardstock.  Also used was Labels 5 cut in half and put on either side of the image.  The coordinating cardstock behind each side measure 2" x 4 1/4" this give the card a sturdy base.
This piece will fold and fit into an A2 envelope when you are done.  
Hope you get a chance to try this fun fold for your next project.

Fabulous Folds Peek

Here is a quick peek of my Fabulous Folds Class Next week 30th @CraftFancy.  We will be creating 4 cards and a 3D project and we will feature Fancy Folds or Fun Shaped cards.   Can't wait to share them all with you!  Check back for more peeks throughout the week.
 

Hope you can sign up for a class or a fun kit, call Craft Fancy to reserve your spot today.   Don't forget your Scoring Tools along with your Basic Tool Kit.

Winter Stenciling


MBstencil1MBstencil2 I'm back at the Memory Box Blog Today.   I've been having a blast playing with all of the new Memory Box Stencils.  Here are a couple of cards inspired by our current winter atmosphere! (just a nice way of saying cold, wind and ice).

1.  For the Birch Card sponged the Antique Linen Distress ink all over the paper before putting down the Stencil and adding the Various Blues/Greys and Blacks over.  Once the color was the depth I wanted I added the die cut bird and the card was done.  You could embellish this so much more but it is stunning in this simple form.
Products Used -
  • Garden Birch Stencil - 88527
  • Resting Birds - 98527
  • Russian Sage Cardstock for the Card Base
  • Distress Ink Antique Linen, Weathered Wood, Stormy Sky, Faded Jeans, Black Soot
  • Red Cardstock to cut the Bird
2.  For the Snow Card I added some Zig 2-way Glue to the back of the Delicate Snowflakes Stencil in a few spots and let it dry.  Then I attachted it to the center of my card to hold it in place.  Sponged all of the Blue Distress Inks all around, concentrating on the center with the deepest colors, and pulled up the stencil.  I then stencilled some letters/words starting with S using the Alphabet Crumbled Stencil in the darkest blue.  Once this was complete I used my 2-way glue again and traced all of the snowflakes and added Distress Glitter - Clear Rock Candy.  It's hard to see in the picture but they really sparkle.  This is a fun Winter Card.
Products Used -
  • Delicate Snowflakes Stencil - 88529
  • Alpha Crumbled Stencil - 88500
  • Blueberry Distressed Dots Paper for Layering
  • Distress Ink - Faded Jeans, Chipped Sapphire, Tumbled Glass, Weathered Wood
  • Distress Glitter - Clear Rock Candy
  • Zig 2-Way Glue pen
 Hope your all staying warm this Winter.  Thank you for stopping by!
 

Koi Love

Good Morning! I'm posting over at the Memory Box Blog again today.  This is a card from my Technique Class today @CraftFancy.  We will be exploring the use of Stencils!  And the new Memory Box Stencils.   

KoiloveToday we are using the Texture Wave Stencil - 88520.  I've sponged on some Peacock Feathers Distress Ink and then misted the entire piece with Perfect Pearls MIst Turquoise.  Once it was dry I added the 2 Clever Koi - 98560 and the Mini Heart Collection - 98763 smallest hearts.  At the end I decided it needed a greeting of some sort and found my Love Script - 98639 for a finishing touch I added a bit of bakers twine.  The patterned paper is Distressed Dot Currant and the Card is Blue Poppy.
Thank you so much for stopping by!  Have a great day!


Butterfly Drifting Milk Carton Set

MBset1
Hello everyone!  I've created a card for today, on the Memory Box Blog using a couple of the new Stencils "Butterfly Drifting - 88504" and "Butterfly Vine - 88524" they are very cool and work together perfectly.  First I stenciled with the "Butterfly Drifting - 88504" and white embossing paste  on turquoise cardstock and let it dry.  Then I sponged over it with the "Butterfly Vine - 88524" and Picked Raspberry Distress Ink.  The affect is very cool and the techniques are endless with these stencils.  I layered everything onto "Currant Distressed Dots" and a white cardstock with some green ribbon.  I also used the "Joy Script - 98641" as the greeting on the card.  When that was done I used a some leftover Turquoise cardstock to cut the "Buttermilk Carton - 98739" from and did the embossing paste process on all four sides of the carton before taping it together.  I then added flowers with the "Sophia Bloom Set - 98840" along the bottom with a little glitter in the middle for sparkle.  Again using Pink Cardstock and the "Currant Distressed Dots"
MBset2
MBset3Hope your enjoying all of the beautiful things created here on the MB Blog with the new dies.  Be sure to check everything out for this entire week!  
 

Bright Birthday Card


Fun bright Birthday Card.  Love this little toaster from Lawn Fawn.  So much fun.  It's hard to tell here but the toaster is layered onto silver mirror card which really pops in real life.


Happy Birthday - January Bombshell Challenge - "Putting on the Glitz"


 It's time to meet Miss January Angela over at the Bombshell Stamps Blog and  jump into her challenge for the month "Putting on the Glitz"!  Remember you get a chance to WIN with each entry.  Ok, Business out of the way.  

Here I used the flower and star from the Butterfly Queen stamp set.  I colored them with Copic markers and Glitzed them up with Stickles of course, my favorite.  The greeting is a Sticker which really pops on the card.  

So all of that being said I am participating in the 100 cards in 100 days over at Splitcoast.  I'm very excited to use up some of my stash.  For this card I used scraps from my scrap drawer, which I had the kids sort over the Holiday break into the drawers by color.  This paper is Basic Grey.  I just matched the markers to the paper.
SpringsingsMB
Good Afternoon,  I'm here with a Clean and Simple Springy Card using one of the new 2014 Collection Dies "Calm Countryside 98779".  This one I die cut twice and layered them on top of each other and over a small piece of Pool Distressed Dots and popped it up onto Key Lime Morocan.  I've added a bird from "Flying Birds 98655" cut out of grey and some Lime Green Stickles to the trees.  This card is my wish for Spring, not that I think it will arrive anytime soon but given the fact that today is our coldest day in a couple of decades one can DREAM!  

Hope you like it.  Head over the the Memory Box Blog to Win and see how to win some new Dies!
 
.